Hello, devs!
I’m not sure how many of you will need to create a gadget for Modern Campus Omni CMS (Also known as OmniUpdate). But I recently had to create one and decided to make this guide to accomplish just that using React or any other JavaScript framework.
Here’s the basic outline for this guide:
Basic Assumptions
Alright, for the purposes of keeping this guide as focused as possible, I want to make a couple assumptions.
- You already a way to set up react applications.
- You will have a place to deploy your app. (I use coolify, however i don’t go over this topic here)
- You already have a GitHub or Gitlab account.
- You already have some programming experience in Javascript and or Javascript frameworks.
- You are already familiar with Modern Campus’s User Interface and navigation.
If you don’t meet any of these assumptions, that’s totally ok! There are plenty of resources on the web that can help you get familiarized with any of the topics. However, I do plan on creating tutorials for Coolify & Github/Gitlab configurations and integrations, so bookmark this page or stay tuned for new posts!
Requirements
For the purpose of this guide, you will need a few things installed on your computer:
- Git (and a github or gitlab account)
- A text editor or IDE
In Modern Campus, you will need to have access to an account with Admin (Level 10) access permissions that can configure gadgets.
Additionally, to make life easier you need to have a server hosting your gadget publicly. I use a Coolify instance hosted on a Digital Ocean account. (Coolify is not a requirement, however you will need a place to deploy and host your app).
Creating a Basic React Gadget
I created a simple React JS repo for you to get started: https://github.com/ChemaSalazar/modern-campus-react-gadget
For OmniCMS to properly register your application, your project requires an index.html and a config.xml file in your project (these are both inside the public/ of the repo).
If you start your dev testing, you will notice that the app will initialize and show the following:

This will allow you set default values when testing your gadget when it is not being invoked from within Omni CMS. Once you register your react app in OmniCMS, the message will update with your site and user data.
Site and user data is handled by the Site & User components within the src/ directory. Notice that both components are triggered to update once it receives a message event from the page. The messages are sent once the gadget.ready() function completes and runs the setSite & setUser functions or is caught by the catch and returns the default text from the image above. You can use this structure to create new components and logic.
Deploying your React App
You may have your own preferences on where to deploy your application, so for this step this will be up to you. The main thing to note is that the application has to be publicly available so that OmniCMS can pull it as an iFrame.
For this step we already have configured a listener web hook to update our coolify instance to pull the latest branch for our repo. All we really have to do is wait for the job to propagate to our live app!
I totally apologize for being short on this section about coolify, I feel like this topic deserves a post of its own. It isn’t a requirement, but i’ve found it to be really helpful when deploying quick applications. Please check back if you are interested in the “coolify” approach, i’ll update this section accordingly.
Registering your React Gadget with ModernCampus
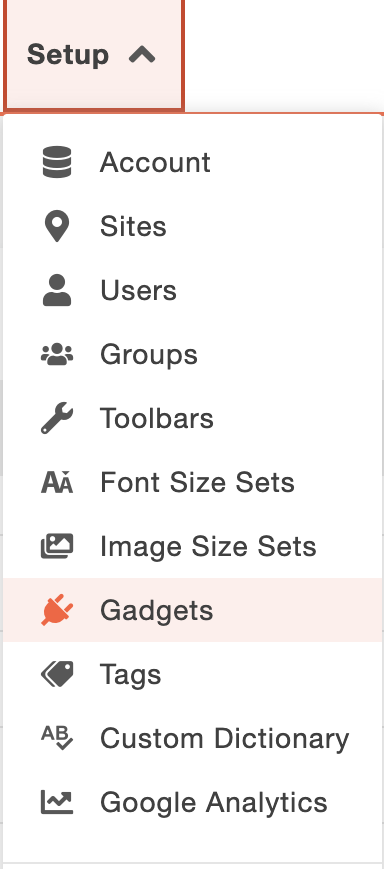
Now we can finally register our gadget within the Modern Campus system. You’ll have to navigate to Setup > Gadgets.
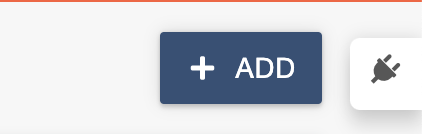
Next press the “+ New” blue button on the right side of your screen.
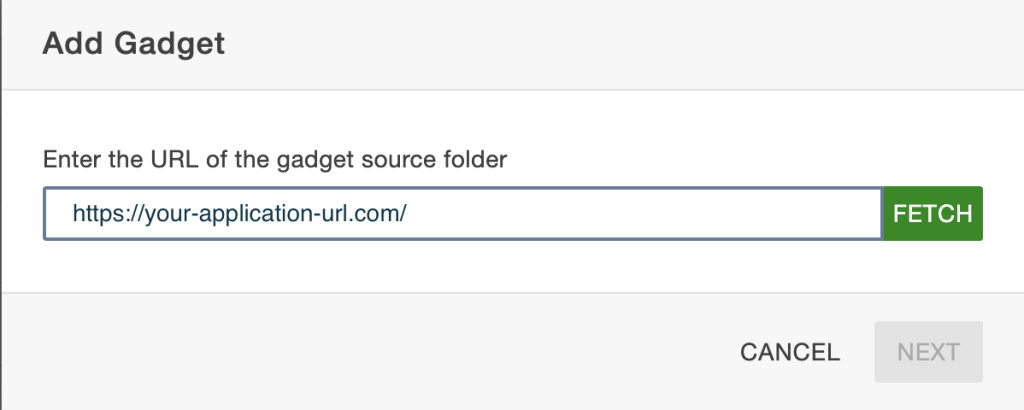
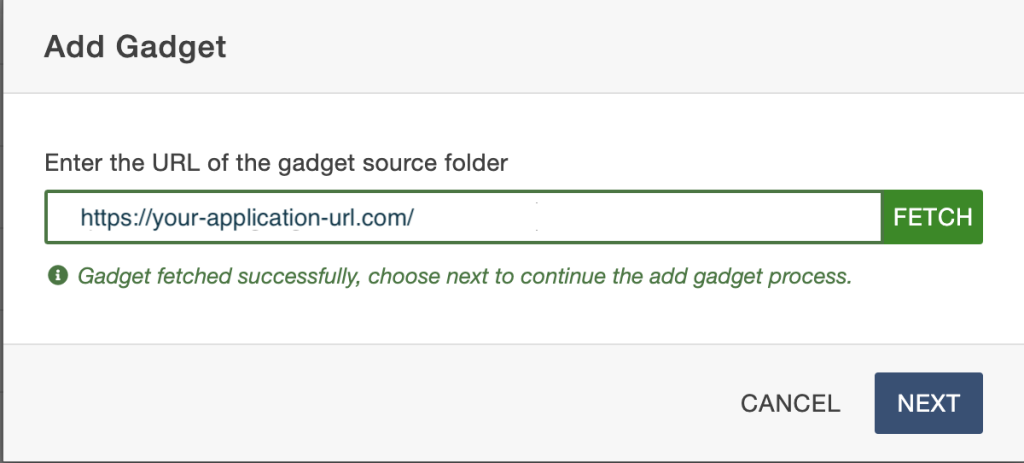
This will trigger a modal to show asking for a gadget source folder URL, you will need to paste your application URL here. Next, press the fetch button to to allow their system to communicate with your config.xml application.
If your application is set up correctly you will receive the following message:
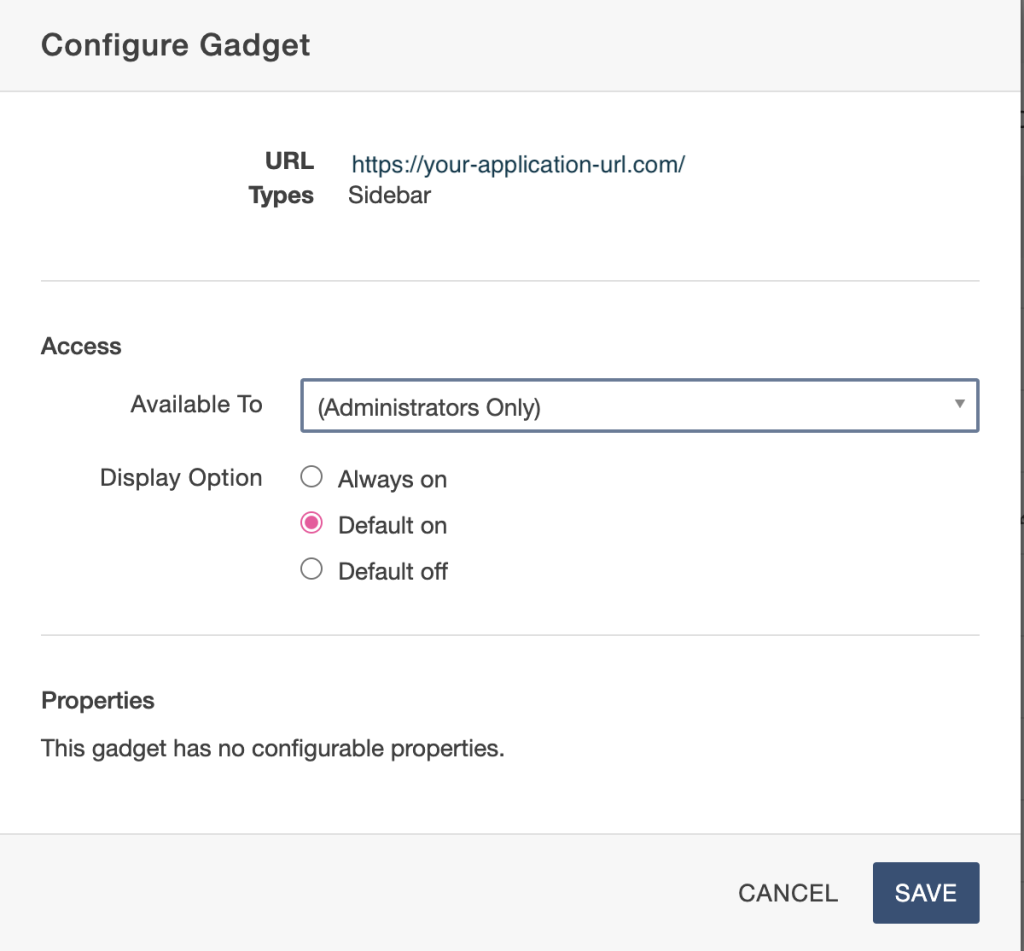
One last step before your gadget gets registered in Modern Campus. Make sure the gadget is only accessible to the appropriate user group. Whenever I test mine I have a special group where only select developers can access the testing gadgets. This prevents other users from attempting to use an unfinished or broken gadget.
The properties section will only be configured if your config.xml file has them set up. For this example we do not have any configured.
When you are done, click the save button to register your app.
🎉 Congratulations! 🎉
Your app is now registered as a gadget within Modern Campus Omni CMS!
You can verify by refreshing your page in the Setup > Gadgets listing view and verifying that your application is now listed.
Also note that the config.xml defines in which contexts the gadget is available. For this repo, the config defines that this gadget only shows up on the sidebar when viewing a page within Omni CMS.
Next Steps
Now that your app is registered and is accessible through OmniCMS you can now continue to extend your application. Something to note is that your changes might not reflect immediately in OmniCMS, make sure that your live app is updated with the latest commit, next got to Setup > Gadgets and on your gadget’s more actions hit refresh.

If this still doesn’t update your gadget, try opening it on an incognito window.
If you found this short guide helpful or have any questions, please let me know in the comments below!